My first experience using GitHub was met with a sea of confusion. "GitHub is a Git repository web-based hosting service, which offers all of the distributed revision control and source code management (SCM) functionality of Git as well as adding its own features" [1]. It's used by my MOOCs for grade assessment. Students upload completed assignment files (such as code text documents and images) to GitHub, made available for viewing by other students. I submitted an assignment for the
Reproducible Research course and pleasantly discovered that the GitHib submission went smoothly. This was largely due to recalling I needed to be in the right directory. The following are the steps I took to submit my work to GitHub. I have assumed the reader has set up a GitHub account and has installed Git Bash on their Windows machine [2].
First I was instructed to "fork" a repository. I need to define some terms here. A repository is "a central location in which data is stored and managed" [1]. "A fork is a copy of a repository. Forking a repository allows you to freely experiment with changes without affecting the original project" [3]. I won't go into the details, but to fork a repository, you follow the GitHub link to the repo (that's what the cool kids call it) and click on "Fork". That's it. The forked repo appears in your list of repositories. The contents of the forked repo are available to you to view. But you are not ready to make changes to the contents of these files and make these changes available to others. In order to do that, a local copy of the repo is required on your computer. In other words, the repo and its contents need to sit in a directory on your computer. The local copy and the repo on GitHub are linked. Changes made to the local copy can be synced with GitHib.
To make a local copy of a repo, you need to clone the repo.
Opening Git Bash [4] I typed "
git clone" [5], space then a URL. The URL points to the forked repo (called "RepData_PeerAssessment1"). My username on Git is "DataMoose".
After hitting Enter, the repo appears in my Home directory, as seen below with the folder called "RepData_PeerAssessment1".
When I open the folder I can view the contents. Note that there exists a "PA1_temlpate.Rmd" file. Later I will overwrite this file.
I stated that knowing what directory I was in was for smoother sailing. To check the current directory, type "
pwd" (which stands for "print working directory").
I'm in my Home directory at C/Users/Karim [6]. I need to change the directory and point to the repo on my machine. Changing directories is achieved by type "
cd" followed by a space, then the folder name (that exists in the current directory) I wish to jump into. Hit Enter.
As a sanity check, type "
pwd" again to confirm you are now in the desired directory. A very useful thing to type to get a feel for this directory is "
git status" [7]. This returned a status on whether any files in the repo had been modified.
Upon completing my assignment, three files ("PA1_template.Rmd", "PA1_template.html", "PA1_template.md") and a folder ("PA1_template_files") contained figures were produced. I copied then pasted the files and folder into my local repo folder, overwriting the "PA1_temlpate.Rmd" file.
Typing "
git add ." will add any new or changed files to git. One can add a specific file by typing out the filename. Use of "
." Will add all files in the directory.
Typing "
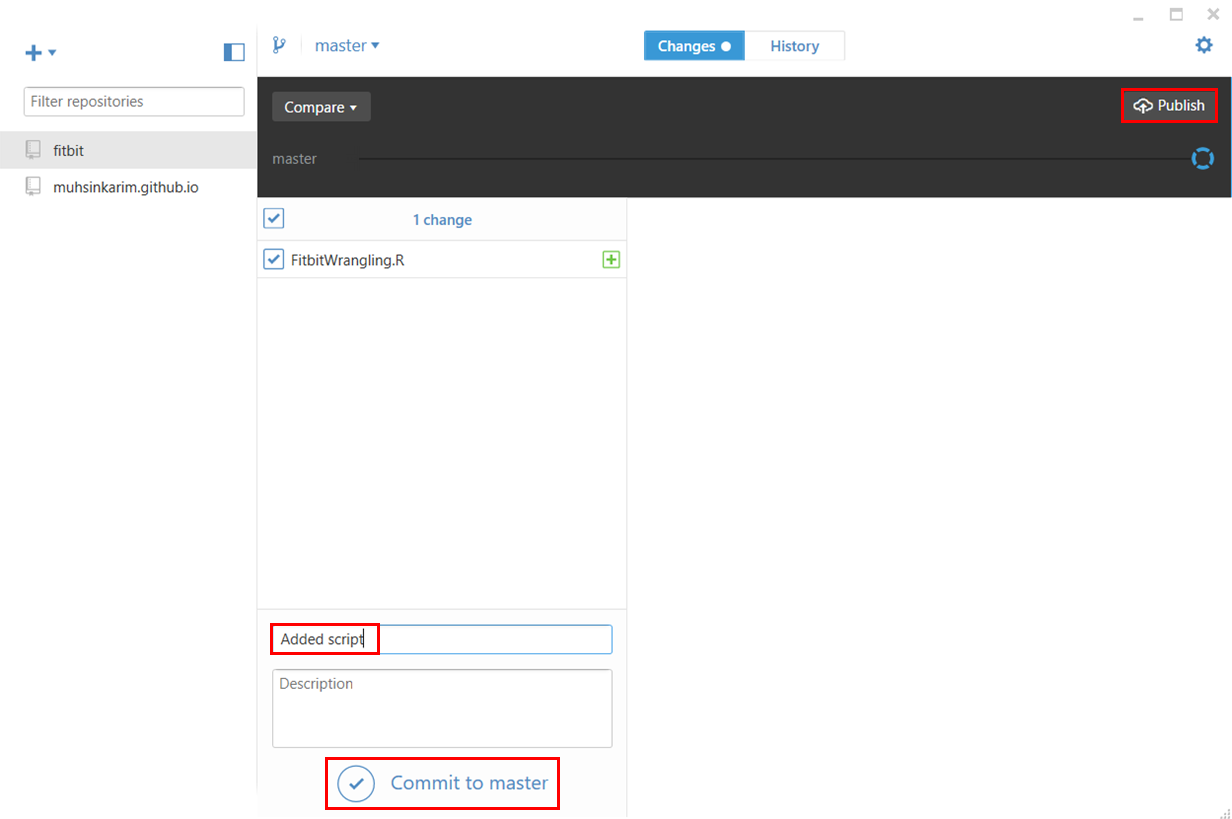
git commit –m" will, I suppose, commit the additions. I'm assuming this step is equivalent to asking "Are you sure you wish to continue?". The "first commit" is my choice of statement. I could write anything and it will display on GitHub. After hitting Enter, the files that are added/committed are listed.
Typing "
git push –u origin master" then hitting Enter will prompt for your GitHub username and password. After (correctly) keying these in, stuff (hopefully) appears to indicate that the files have been added to the repo on GitHub.
Refreshing your GitHub repo list, you will see that the new/changed files have appeared (those with "first commit").
That's how we fork, clone, add, commit, push with Git. GitHub is a fantastic (free) tool for version control of your work. In the event you made a blunder, you can rollback to prior versions of files. For my purposes, students can hopefully award me full grades for my assignment.
References and notes
1. I Googled this.
3. Help from: https://help.github.com/articles/fork-a-repo/
4. Allow me a moment to get all colloquial on your ass. Git Bash is an interface that lets me type in single line commands that gets the computer to do stuff, OK? OK!
5. As guided by: https://help.github.com/articles/fork-a-repo/
6. My name is Karim. Nice to meet you.
7. I was guided by: http://guides.railsgirls.com/github/