Sharing code with the internets is made possible with GitHub.
In a previous post I outlined how to add, commit and push code on GitHub via Git Bash, a scary looking terminal that sane people avoid. I’ve since played with the
GitHub app which makes sharing even easier. Here I will create a repo and
share my Fitbit R data wrangling code.
I’ve assumed one has a GitHub account and the GitHub app
installed. I first need to create a repo. On the GitHub site I clicked on the “+”
symbol and selected “New repository”. There’s also a helpful green “New repository”
button which would have saved me one click.

I entered “fitbit” as my repository name then selected “Create
repository” at the bottom.

On the next screen (above) I selected “Set up in Desktop”. An “External
Protocol Request” popup appeared and I selected “Launch Application”. Then
magic happened. Magic. I was prompted to select where I wished to place my repo
on my local machine (below). My repos exist under Documents > GitHub. Hitting OK,
the repo cloned. My fitbit repo appeared on the left hand side of the GitHub
app.


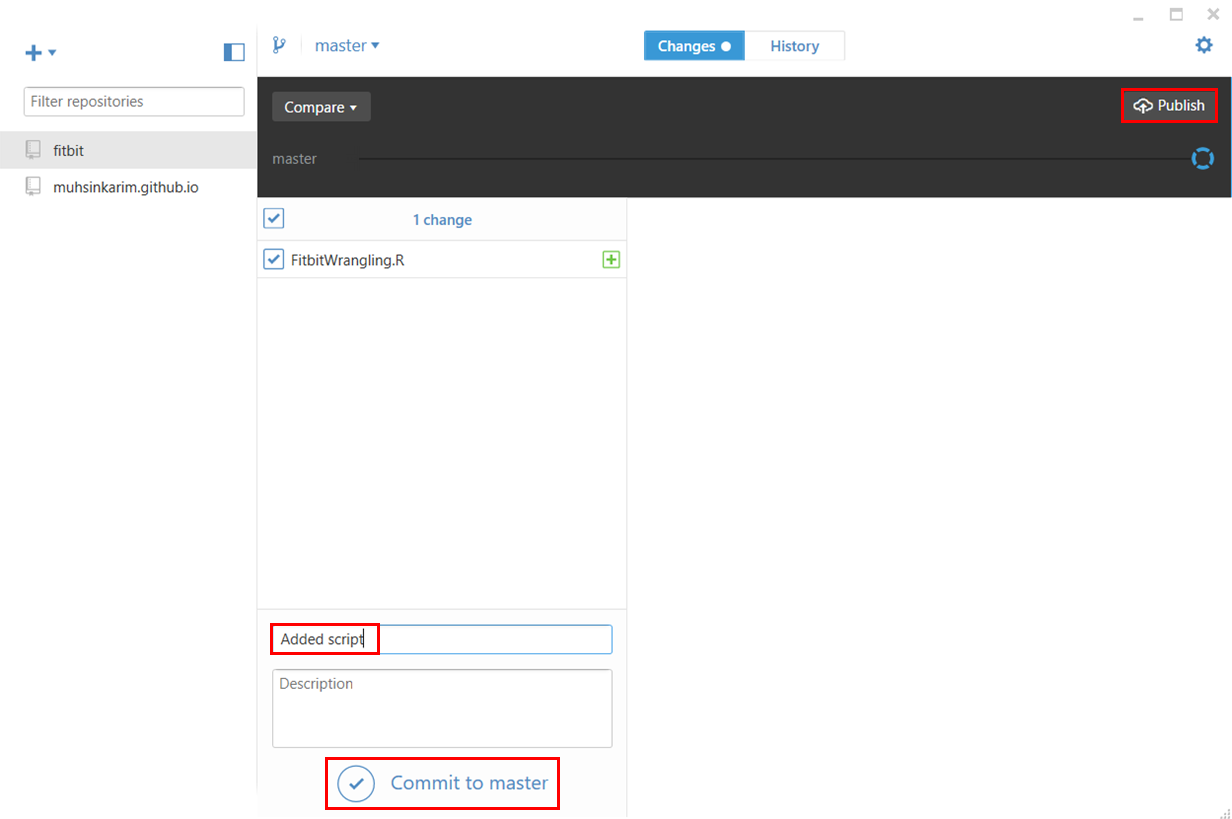
Returning to the GitHub app, it’s detected the addition of
my script. I enter something in the “Summary” text field then select “Commit to
master” below the “Publish” top right.
Then returning to GitHub, I hit refresh on my fitbit repo,
and boom! My script appears on the internets. As I make changes to the script
on my local, the GitHub app will allow me to commit changes and publish online.

No comments:
Post a Comment